At-Home Video Recording Guide
Windows users: Meet the Camera
Aptly named, most Windows PCs come with a recording app called Camera. To get started, open up the Camera app. The easiest way to do that is to search for it (the search bar is in the bottom left corner of your screen in Windows 10). If this is the first time you’re firing it up, you may need to give the app some permissions.
Once the app is ready to go, your camera will engage and you’ll see a live feed of yourself looking surprised, plus the camera and video buttons on the right of the screen. To start recording, click the video button to select video mode, then click it again to start recording. After you’re done, your files will be saved to your Camera Roll (you can change this in Settings). You can open your Camera Roll to check your footage by clicking the small thumbnail image in the bottom right corner of your screen.
If you want some extra control over picture quality, you can adjust the resolution, aspect ratio, and frame rate through the Settings (the cog symbol in the top right corner of your screen). The Camera app also comes with a “pro” mode that lets you adjust things like brightness and exposure.
The Camera app’s clean interface makes it super easy to use, while the “pro” mode gives you a little bit of extra control over your video quality.
(excerpt from https://biteable.com/blog/tips/best-webcam-recorders/)
Here you go Apple users: Record a video in Photo Booth on Mac
You can take a single photo or a group of four photos, or record a video using your computer’s built-in camera or an external video camera connected to your Mac.
Record a video
If you’re using an external video camera, make sure it’s connected to your computer and turned on.
- In the Photo Booth app on your Mac, if you see the View Photo Preview button or the View Video Preview button, click it to see the Take Photo button or the Record Video button.
- Click the Video button in the bottom left.
- Click the Record Video button. Click the Stop button when you finish recording.
Video lighting on a budget
All cameras capture better-looking video when there is a good light source, and webcams are no exception. When selecting a place to record, avoid locations with low light or too much backlighting (windows in the background are often a challenge for webcams). Poor lighting may leave your video looking washed out, or worse, may leave you looking like a shadowy figure.
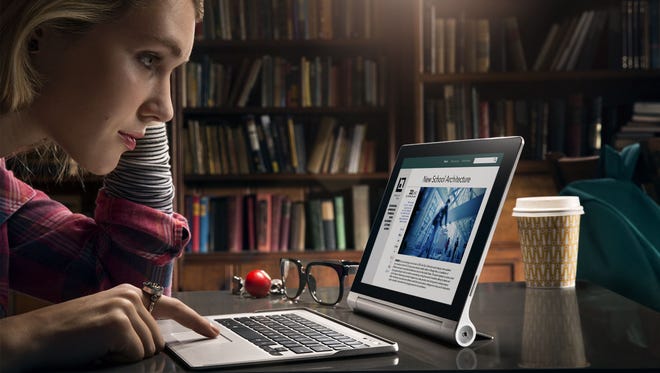
Ideally, you want to light yourself from the front with soft, indirect light, and minimize other lighting in the room, particularly from windows or light sources behind you. Place a light with a lampshade in front of you and behind your webcam. Natural light from windows is ideal—as long as it is not behind the subject (you).
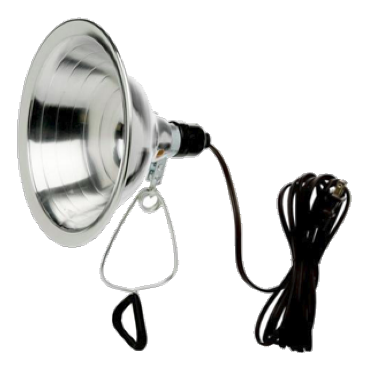
In production studios, we have a drawer full of clamp lights. At around $10 each, these lights are versatile and can be mounted in a variety of ways. Unfortunately, clamp lights do not have a dimming control or diffusion. They can lead to harsh lighting. Light with no filter is known as hard light. Diffusion helps spread light evenly, creating soft light, and can be improvised even on a budget. When working with clamp lights, we highly suggest using some type of diffusion material.
The most common setup for lights is called 3-point lighting. This configuration consists of a key light, a fill light, and a backlight.
The key light should be the brightest of the three and provides the bulk of light to your subject (you).
The fill light eliminates shadows caused by the key light. Your fill should be less intense than your key so while it still eliminates shadows, but doesn’t a flat looking shot due to the fill and key lights matching too closely.
The backlight separates your subject (you) from the background, creating depth and also preventing a flat looking shot. Your backlight can be hard light (no diffusion), as it won’t create shadows visible to the camera on the subject’s face.

These lights can also be bounced off a surface like a wall, ceiling, or reflector to create soft light, which is infinitely preferable to blinding your subject and creating an unflattering image.
( excerpt from https://www.techsmith.com/blog/get-perfect-lighting-video/)
Position your webcam like a pro
Most of us don’t intuitively know how to frame ourselves for video. And why would we? Unless you’re a film major or a TV journalist, you’re not exactly learning this in school.
Here are four common mistakes seen in webcam selfies, along with some simple (and free!) fixes for making your shot look more flattering and professional:
1. Use a Little Less Head Room
When most people sit down in front of a webcam, they position themselves so their head is smack dab in the middle of the screen (if they give any thought to it at all).

Instinctively, this just looks off. In industry speak, there’s too much head room.
Head room refers to the amount of space between the top of your head and the top of the frame. Put too much and you’ll look small and insignificant. Put too little (or none) and it will look like your head is stuck to the top of the screen.
Here’s the secret to getting the right amount of head room. Imagine a “tic tac toe” grid laid over top of your screen. Instead of placing the your head in the center square, put your eyes along that imaginary top third line of the tic tac toe grid. Make sure you can see your shoulders in the shot.
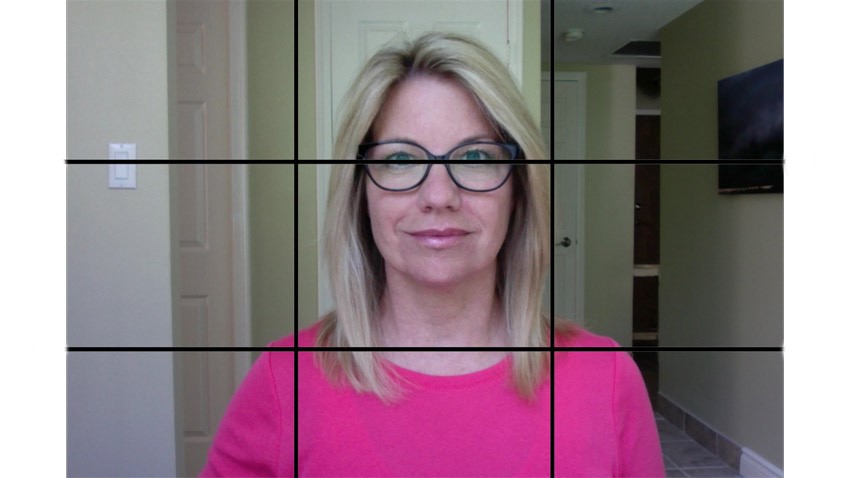
Doesn’t that look a lot better?
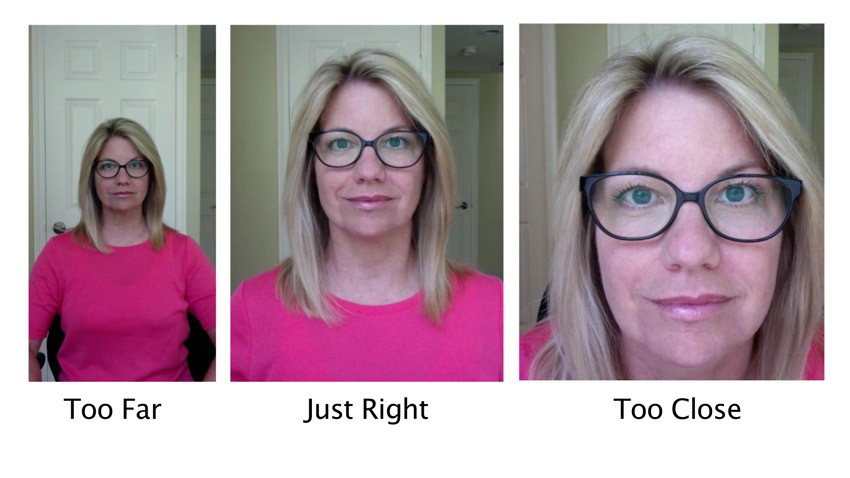
This type of head-and-shoulders shot is ideal for communication. Any further away, and you start to lose that personal contact. And if you move too close to the camera, it gets uncomfortable for the viewer (remember Seinfeld’s “close talker”?).
 2. Raise the Webcam Up to Eye Level
I don’t know about you, but I don’t enjoy looking up people’s noses. Low camera angles are not flattering to anyone—they just make your face look jowly and distorted (and who wants that?).
This isn’t usually a problem with desktop computers. Their webcams are roughly at eye level when we sit in front of them. But laptops on a table or desk are lower, and we have to look down into the camera’s lens.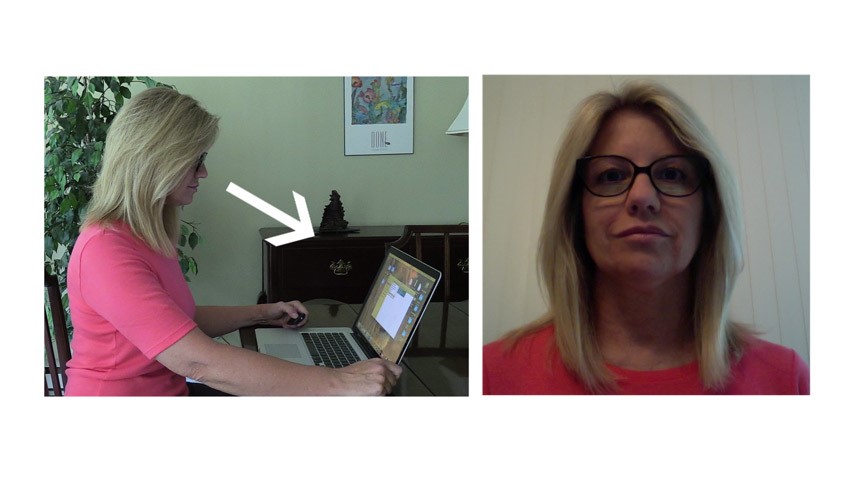 The solution is simple: bring that webcam up to your eye level, or even slightly above. Try stacking a few books underneath your laptop, or lowering your chair.
(Excerpt from: https://photography.tutsplus.com/tutorials/how-to-frame-your-webcam-video-like-a-pro–cms-27228)
Can you hear me?
Your camera’s onboard microphone should be sufficient for any recording you do at your computer terminal, but if you plan on recording a larger room, a USB microphone is suggested.
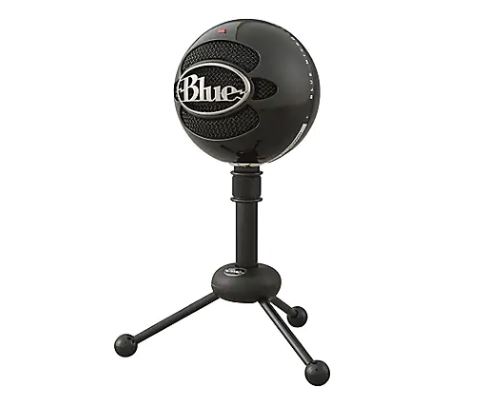
The Blue Snowball microphone is a great option. The snowball mic is as plug-and-play as it gets, so you don’t have to worry about spending too much time fussing with your setup. If you’re looking to have more control over your audio input, then this microphone is a sure-fire win! The Blue Snowball microphone sells for around $70.00. Any USB condenser microphone should suit your purposes–shop around, try things out.
Filming worship, personal reflections, or leading groups from home is new to many in the Episcopal Church, but, rest assured, this is not new. Resources, technology, and help can be found all over the internet. If you get stuck, the answer can be found—just ask.